#Visual Basic Tutorial
Explore tagged Tumblr posts
Visit Tumblr Blog
Explore Tumblr blogs with no restrictions, modern design and the best experience.
Last Seen Tumblr Blogs


Fun Fact
Tumblr was created by web developers David Karp and Marco Arment.
Text
Restaurant Banner design in coreldraw|metafreefile
youtube
#Smart AI #Advanced AI #Innovative AI #Cutting-edge AI #Efficient AI #Powerful AI #Adaptive AI #Insightful aI#RestaurantBannerDesign #CorelDrawTutorial #GraphicDesign #BannerDesign #CorelDrawTips #DesignTutorial #RestaurantMarketing #VisualDesign #CreativeDesign #DesignTips
#Intelligent#Smart#Advanced#Innovative#Cutting-edge#Efficient#Powerful#Adaptive#Insightful#metafreefile#comment#Restaurant Banner Design#CorelDraw Tutorial#Banner Design Tips#Restaurant Marketing#Graphic Design#CorelDraw for Beginners#How to Design Banners#Visual Design#Design Tips#Marketing Banners#Create Banners in CorelDraw#Pro Design Tips#Step-by-Step CorelDraw#CorelDraw Basics#Restaurant Banner Ideas#CorelDraw Projects#Beginner CorelDr#Youtube
0 notes
Text
🎮 HEY I WANNA MAKE A GAME! 🎮
Yeah I getcha. I was once like you. Pure and naive. Great news. I AM STILL PURE AND NAIVE, GAME DEV IS FUN! But where to start?
To start, here are a couple of entry level softwares you can use! source: I just made a game called In Stars and Time and people are asking me how to start making vidy gaems. Now, without further ado:
SOFTWARES AND ENGINES FOR PEOPLE WHO DON'T KNOW HOW TO CODE!!!
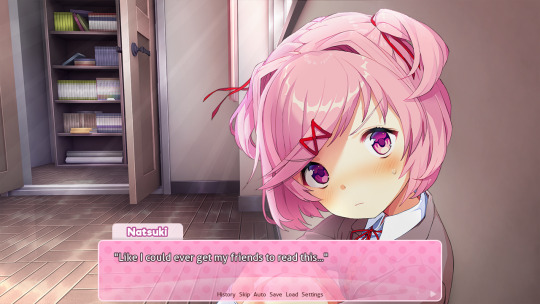
Ren'py (and also a link to it if you click here do it): THE visual novel software. Comic artists, look no further ✨Pros: It's free! It's simple! It has great documentation! It has a bunch of plugins and UI stuff and assets for you to buy! It can be used even if you have LITERALLY no programming experience! (You'll just need to read the doc a bunch) You can also port your game to a BUNCH of consoles! ✨Cons: None really <3 Some games to look at: Doki Doki Literature Club, Bad End Theater, Butterfly Soup
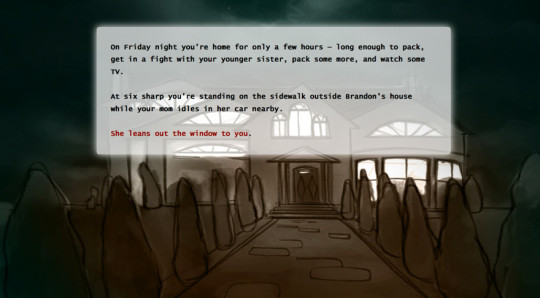
Twine: Great for text-based games! GREAT FOR WRITERS WHO DONT WANNA DRAW!!!!!!!!! (but you can draw if you want) ✨Pros: It's free! It's simple! It's versatile! It has great documentation! It can be used even if you have LITERALLY no programming experience! (You'll just need to read the doc a bunch) ✨Cons: You can add pictures, but it's a pain. Some games to look at: The Uncle Who Works For Nintendo, Queers In love At The End of The World, Escape Velocity

Bitsy: Little topdown games! ✨Pros: It's free! It's simple! It's (somewhat) intuitive! It has great documentation! It can be used even if you have LITERALLY no programming experience! You can make everything in it, from text to sprites to code! Those games sure are small! ✨Cons: Those games sure are small. This is to make THE simplest game. Barely any animation for your sprites, can barely fit a line of text in there. But honestly, the restrictions are refreshing! Some games to look at: honestly I haven't played that many bitsy games because i am a fake gamer. The picture above is from Under A Star Called Sun though and that looks so pretty
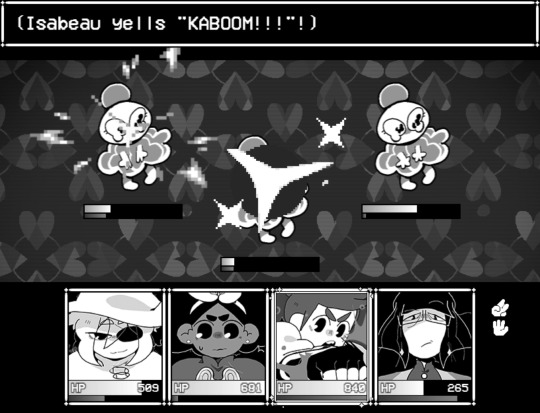
RPGMaker: To make RPGs! LIKE ME!!!!! NOTE: I recommend getting the latest version if you can, but all have their pros and cons. You can get a better idea by looking at this post. ✨Pros: Literally everything you need to make an RPG. Has a tutorial inside the software itself that will teach you the basics. Pretty simple to understand, even if you have no coding experience! Also I made a post helping you out with RPGMaker right here! ✨Cons: Some stuff can be hard to figure out. Also, the latest version is expensive. Get it on sale! Some games to look at: Yume Nikki, Hylics, In Stars and Time (hehe. I made it)
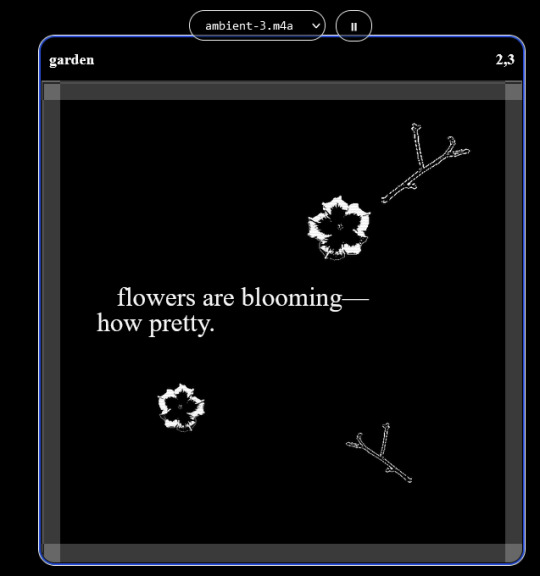
engine.lol: collage worlds! it is relatively new so I don't know much about it, but it seems fascinating. picture is from Garden! NOTE: There's a bunch of smaller engines to find out there. Just yesterday I found out there's an Idle Game Maker made by the Cookie Clicker creator. Isn't life wonderful?
✨more advice under the cut. this is Long ok✨
ENGINES I KNOW NOTHING ABOUT AND THEY SEEM HARD BUT ALSO GIVE IT A TRY I GUESS!!!! :
Unity and Unreal: I don't know anything about those! That looks hard to learn! But indie devs use them! It seems expensive! Follow your dreams though! Don't ask me how!
GameMaker: Wuh I just don't know anything about it either! I just know it's now free if your game is non-commercial (aka, you're not selling it), and Undertale was made on it! It seems good! You probably need some coding experience though!!!
Godot: Man I know even less about this one. Heard good things though!
BUNCHA RANDOM ADVICE!!!!
-Make something small first! Try making simple: a character is in a room, and exits the room. The character can look around, decide to take an item with them, can leave, and maybe the door is locked and you have to find the key. Figuring out how to code something like that, whether it is as a fully text-based game or as an RPGMaker map, should be a good start to figure out how your software of choice works!
-After that, if you have an idea, try first to make the simplest version of that idea. For my timeloop RPG, my simplest version was two rooms: first room you can walk in, second room with the King, where a cutscene automatically plays and the battle starts, you immediately die, and loop back to the first room, with the text from this point on reflecting this change. I think I also added a loop counter. This helped me figure out the most important thing: Can This Game Be Made? After that, the rest is just fun stuff. So if you want to make a dating sim, try and figure out how to add choices, and how to have affection points go up and down depending on your choices! If you want to make a platformer, figure out how to make your character move and jump and how to create a simple level! If you just want to make a kinetic visual novel with no choices, figure out how to add text, and how to add portraits! You'll be surprised at how powerful you'll feel after having figured even those simple things out.
-If you have a programming problem or just get confused, never underestimate the power of asking Google! You most likely won't be the only person asking this question, and you will learn some useful tips! If you are powerful enough, you can even… Ask people??? On forums??? Not me though.
-Yeah I know you probably want to make Your Big Idea RIGHT NOW but please. Make a smaller prototype first. You need to get that experience. Trust me.
-If you are not a womanthing of many skills like me, you might realize you need help. Maybe you need an artist, or a programmer. So! Game jams on itch.io are a great way to get to work and meet other game devs that have different strengths! Or ask around! Maybe your artist friend secretly always wanted to draw for a game. Ask! Collaborate! Have fun!!!
I hope that was useful! If it was. Maybe. You'd like to buy me a coffee. Or maybe you could check out my comics and games. Or just my new critically acclaimed game In Stars and Time. If you want. Ok bye
#reference#gamedev#indie dev#game dev#tutorial#video game#ACTUAL GAME DEVS DO NOT INTERACT!!!1!!!!!#this is for people who are afraid of coding. do not come at me and say 'actually godot is easy if you just--' I JUST WILL NOT.#long post
36K notes
·
View notes
Text
BEGINNERS GUIDE TO BLUESKY
Hiya! Curious about joining bluesky but intimidated by all the features? Already on bluesky but want to learn more? Then welcome to my quick guide on getting started and navigating bluesky!~
What is Bluesky?
it’s a social media site that’s owned by no single person or company. it's aim is to bring back the early days of twitter before bots, elon musk or algorithms took over. Personally I find the site really cozy, wholesome, and engaging. my Bluesky account for example
What’s unique about Bluesky?
→ CUSTOMIZATION: your timeline is very easy to control. There’s tons of options, so be sure to go through each tab in your settings. some options include: turning off autoplay, changing the order in which threaded replies show, changing DM settings, content preferences and lots of visual app settings.
→ MODERATION LISTS: human made, mass blocklists. These are public lists of accounts that when you subscribe to you automatically block or mute everyone in that specific blocklist. A great way to avoid unwanted content, and interactions. ✦ Moderation lists I recommend will be below the cut
→ STARTER PACKS: recommendation lists on who to follow, made by users. You can even curate your own starter pack of recommendations! ✦ Starter pack recommendations will be below the cut
→ FEEDS: public timelines, basically. There are a lot of feeds you can join, or you can even create your own. I made a feed featuring just my pixel art so it doesn’t get cluttered with text posts or other photos in my media tab. ✦ I’ll post feeds I recommend below and link you to a tutorial on how to create your own feed
→ BLOCKING/MUTING: bluesky has a great blocking system. When you block someone they can no longer see, or interact with you. They also have a feature to make your blog inaccessible unless logged in. you can also mute specific people, delete post replies, and even detach your post from a reblog. You can also mute specific words, phrases, tags etc.
→ NSFW: bluesky allows NSFW content, including artwork, porn, lewds etc. They also have a great moderation page to avoid the content completely, censor the content, or show it if you’d wish. ✦ just go to settings > moderation > toggle on NSFW settings and it’ll let you heavily moderate.
→ LABELS: this is a really cool feature on the site, you can subscribe to certain pages that enable a lot of fun/useful labels that help you in different ways! (like pronoun tags, artist tags etc) ✦ Labels to browse will be posted below
→ COMMUNITIES: the vastly diverse communities really feel like the best parts of tumblr. since you can so heavily curate your experience, it can really feel like a calming oasis. Mine is mostly artists, and other creatives.
there’s also a large community of professional artists, art directors, authors, celebrities, and even the best shitposters from twitter. the app really is what you make of it but it’s thriving right now.
RECOMMENDATIONS & LINKS BELOW ⬎
→ MODERATION LISTS:
HATE SPEECH: NAZIS | MAGA | MAGAv2 | MAGAv3 | TRANSPHOBES & HOMOPHOBES | FAR RIGHT | FAR RIGHTv2 | FAR RIGHTv3 | ELON MUSK FANBOYS | ANTI-BLACK | ANTI-VAX
NFT/AI/CRYPTO: MASTERLIST | AI/NFT | AI/NFTv2 | AI FANBOYS | CRYPTO | NFTs
SPAM/SCAMMERS: SPAMBOTS | BOTS | CONTENT SCRAPERS | CONTENT FARMING
✦ to block or mute everyone in the blocklist at once, click subscribe in the top right corner:

→ STARTER PACKS:
ART: PIXEL ART | PIXEL ARTv2 | WOMEN OF PIXEL ART | BADASS DIGITAL ARTISTS | MAGIC THE GATHERING ARTIST | PAINTERS OF BLUESKY | INDIE COMIC CREATORS | LGBTQIA+ COMIC CREATORS | WEBCOMICS ULTIMATE COLLECTION
GENERAL: WOMEN OF BSKY | AUTHORS | LGBTQ NEWS
SHITPOSTERS: JUNIPER | JUNIPERv2 | MASTERLIST | SCIENCE SHITPOSTERS
✦ for more niche starter packs, use the search function. search your specific interest and ‘starter pack’ and you’ll find some!
→ FEEDS:
DISCOVER | WHATS TRENDING | MENTIONS | ART | TRENDING ART
THE GRAM: a timeline for exclusively image posts from those you follow. no textposts etc. ONLYPOST: similar to the gram, it shows a timeline of only those you follow. no reposts, just original posts. 📌: a way to bookmark posts. just reply with the pin emoji.
✦ there’s tons of others feeds as well! just use the feed tab and you can browse feeds or search for specific ones.
✦ TUTORIAL ON HOW TO CREATE A CUSTOM FEED FOR YOUR ART/POSTS
→ LABELS:
SKYWATCH: most popular label. Lots of useful labels!
AI Labels: identifies AI users, can also enable hiding the posters.
Pronouns: self explanatory but useful. can add a badge with your pronouns!
✦ you can search for additional label bots on bluesky!
OTHER RECOMMENDATIONS:
✦ EXPIRIENCE ENHANCING TOOLS RECS ✦ CLEARSKY: TRACK BLOCKS AND BLOCKLISTS ✦ SKYFEED: CREATE CUSTOM FEEDS EASILY ✦ use the block function often. do not entertain trolls or hate speech. ✦ as well as starter packs, there’s also lists! lists can be used in the same way to create curated lists of accounts. it’s a good way to keep track of specific genres of posters you’re interested in, and finding new ones! ✦ hashtags: use them! they’re beneficial in boosting your post. you can even link hashtags in your bio making you easier to find. another method of making you more visible is if you post an ‘interest’ post! basically just type things you’re interested in and it’ll help people find you / vice versa ! ✦ update your profile first thing, like bio avi etc. make a small post so people know you're real. interact and engage! the communities there are so welcoming!
I think that covers abt everything i wanted to cover! Hope this was helpful and thanks for reading lol
#bluesky#bluesky starter pack#bluesky social#bsky.app#bsky#bsky social#bluesky tutorial#bluesky walkthrough#bluesky app#ooooooooook that took forever lol hope its useful!!!!!!!!#long post#text post
6K notes
·
View notes
Text
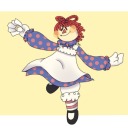
@dimiclaudeblaigan asked for a tutorial on how to begin drawing. Good news! If you can draw a funky looking stick man, you have already started!
I think that stick people are a great starting point for artists because of the things you can learn from them that will be important later on.
If you are able to draw a circle and a couple of lines, you can easily put together a stick person.

Congratulations! You have started to draw. :)
A stick person is a very minimal artistic representation of a real life person. It is simple yet recognizable, and is widely used in art, media, and signage.
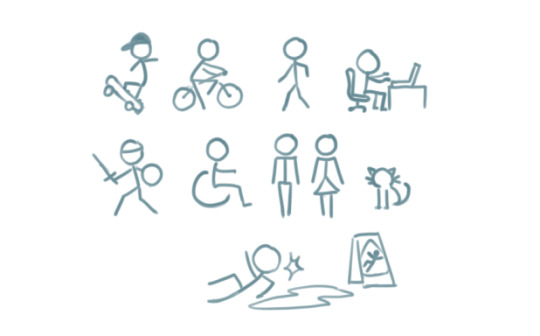
But what can a stick person teach us about drawing people that look more like… well, people? Lets have a look!
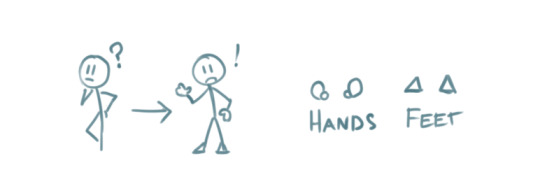
By simply adding a few more lines, we can add a pair of eyes and a mouth. Maybe even a little triangle nose! Or half circles for ears. We can now draw a face, which provides a basis for all sorts of expressions.

These simple additions can allow us to explore the wide range of human emotion and individuality.

This may seem like the basics of the basics. But that is what we want! In order to get to the point where we are able to draw complex, elaborate representations of humans and objects, we will need to start with simple shapes like lines and circles and build our understanding from there.
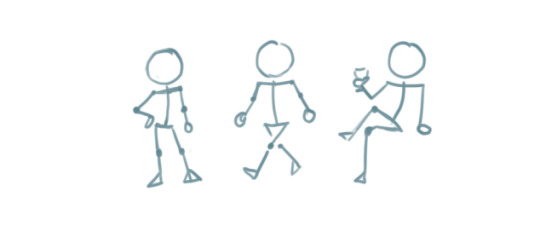
For instance, lets give our stick person some cool new features, such as hands and feet. I chose little squiggly circles to represent hands, and triangles to represent feet.
We can go a step further and modify the body of the stick person to include shoulders, hips, elbows and knees. These parts of the human body are quite complex in real life But here, all we need to do is add a few simple lines and dots to our stick person.

The lines provide some additional structural elements to our stick person's body, which are the shoulders and the hips. The dots indicate the points of articulation - elbows and knees, the places where the arms and legs bend!
Now we can use our stick person to show us an even wider range of human movement, action, and expression.
Our little drawing of a human being is evolving! All it took was adding a few more lines and shapes here and there.
By elongating some of the existing lines and making the head an oval instead of a circle, we can give our stick person proportions that resemble that of a real life human.
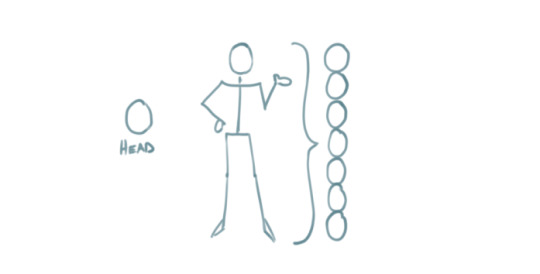
By this point, we have managed to add more complexity to our stick person simply by using our ability to draw lines, circles, and other basic shapes!

These basic ideas are the building blocks that will enable us to create more complex shapes.
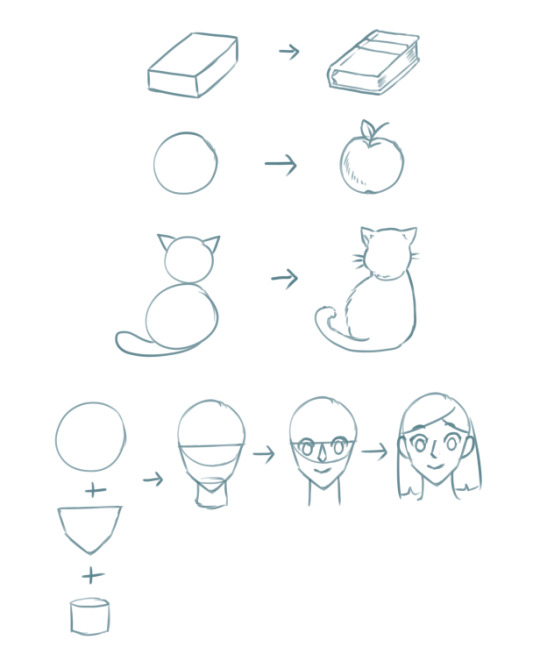
The next part may be a considerable step up if you are absolutely new to drawing, but I have decided to include it in order to show you how complex objects like the human body can be built from shapes that are a bit more complex than circles and lines.
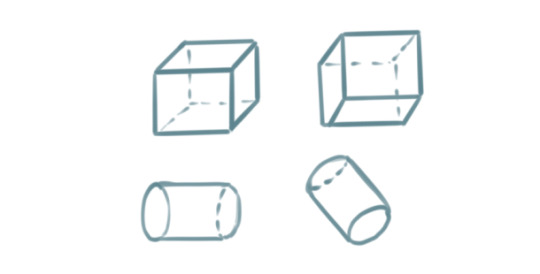
For example. Two ovals and a rectangle can be combined to create a cylinder.

Six squares can be combined to create a cube, or a box. Here, each square is distorted slightly depending on which way the cube is facing.

Note that the back faces of the cube and the bottom of the cylinder are hidden. These shapes allow us to visualize that which should not normally visible.
A sphere from all perspectives can be represented by a circle. But we can make it more like a sphere by adding lighting and shadow if we so desire.

Cubes, cylinders, and spheres are examples of 'solid shapes' because they consist of 3 dimensions.
Lets see how these solid shapes can be used to compose the human body.
By stacking three cylindrical objects, we can create a torso. Two spheres have been added to form shoulders, while a smaller cylinder forms the neck.

An arm is an alternating sequence of spheres and cylinders connected together. Note that the hand has been simplified for this example.
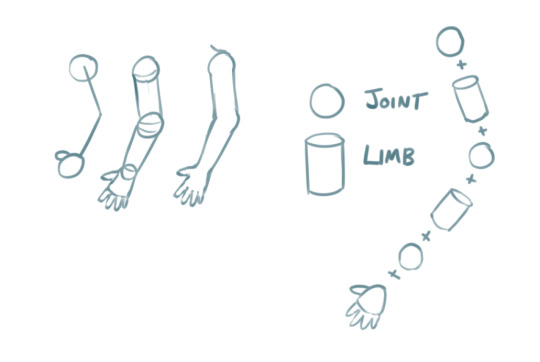
We can apply these solid shapes to the rest of the body to give us a more recognizable representation of the human form. It doesn't even have to be perfect. And just like that, our stick figure now has a silhouette that is unmistakably a person!
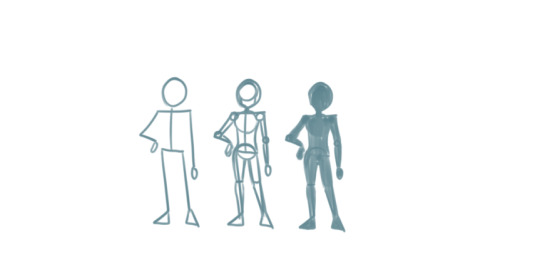
In the above examples, notice that we kept the stick person at the beginning while building up the shapes and solids around it. This is because the stick person serves as a guide for positioning the body and its various parts -> also known as posing.
You can do the same thing to everyday objects! Here, I drew a wine glass by stacking these three dimensional solid shapes.
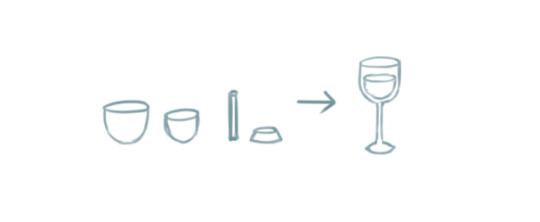
The cup and its contents are two ovoid shapes that were cut in half. The stem is a very thin cylinder shape. The base is a cylinder with a slightly wider bottom.
Solid shapes help inform us how objects and parts of the human body may appear from different perspectives.
For example, a sphere can be used to demonstrate how the human head appears when looking up or down, turned to the side, or tilted at an angle.

With these examples, I hope I have managed to convinced you that if you can draw a circle and a couple of lines, you can draw a person! You just have to train your eye to recognize the simple shapes within complex objects. Try it with everyday objects as well! Or even your favourite media! A drawing subject can be as simple or as complex as you envision it to be.
Once you have mastered that, there are many aspects of drawing you can explore from here that may require you to seek additional resources or a fellow artist's advice.

Last of all, remember that drawing is an iterative process. Even if you draw something correct the first time, you will need to draw it again and again to get it right all times! And by making small changes like the ones we explored in this tutorial, your drawings will gradually transform!
I hope what I've demonstrated here are enough to provide the basics of how to get started with drawing objects and people, and also to help refresh more experienced artists. :) Hopefully I didn't go too off topic with what was requested, and let me know if there are any more questions I can answer.
Cheers :3
32K notes
·
View notes
Text
My GIF Making process: Screen capturing using MPV player, Organizing files, 3 Sharpening settings, Basic Coloring PSD + Actions set

This is a very long post so heads up.
I’ll try to be as thorough and true as much as possible to the way I make my gifs (I already use Photoshop Actions which I’ve long since set up but now for this tutorial I’m reviewing them to show you the exact steps I’ve learned to create my gifs 😃) and present them to you in a semi-coherent way. Also, please bear with me since English is my second language.
First things first. Below are the things and tools we need to do this:
Downloaded 4K or 1080p quality videos (let’s all assume we know where to get these—especially for high definition movies and tv series—so this post doesn’t get removed, okay? 😛)
Adobe Photoshop CC or the CS versions can work as well, but full disclosure I haven’t created gifs using the CS versions since 2020. I’m currently using Adobe Photoshop 2024.
mpv player. Use mpv player to get those frames/screenshots or any other video player that has a screen grabber feature. I’ve used adapter for the longest time but I’ve switched to mpv because the press to screenshot feature while the video is playing has been a game changer not to mention ultimate time saver for me. For adapter you need to play it in another video player (like VLC player), to get the start and end timestamps of the scene you want to gif which takes me ages before I can even open Photoshop.
Anyway! Please stop reading this post for a moment and head over to this amazing tutorial by kylos. She perfectly tells you how to install and use mpv player, both for Mac and Windows users.
One thing I have to share though, I had a tough time when I updated my MacOS to Sonoma since MPV is suddenly either duplicating frames or when I delete the duplicates the player seems to be skipping frames :/ I searched and found a solution here, though it didn’t work for me lol. My workaround for this in the meantime is decreasing the speed down to 0.70 then start screenshotting—it’s not the same pre Sonoma update but it works so I’ll have to accept it rather than have jumpy looking gifs.
Now, after this part of kylos’ tutorial:

you can continue reading the following sections of my gif tutorial below.
I want to share this little tip (sorry, this will only cater to Mac users) that I hope will be helpful for organizing the screenshots that MPV saved to the folder you have selected. Because believe me you don’t want to go through 1k+ of screenshots to select just 42-50 frames for your gif.
The Control + Command + N shortcut
This shortcut allows you to create a new folder from files you have pre-selected. As you can see below I have already created a couple of folders, and inside each folder I have selected screenshots that I want to include in one single gif. It's up to you how you want to divide yours, assuming you intend to create and post a Tumblr gifset rather than just one gif.

Another tip is making use of tags. Most of, if not all the time, I make supercorp gifs so I tag blue for Kara and red (or green) for Lena—just being ridiculously on brand and all that.
Before we finally open Photoshop, there's one more thing I want to say—I know, please bear with me for the third? fourth? time 😅
It's helpful to organize everything into their respective folders so you know the total number of items/frames you have. This way, you can add or delete excess or unnecessary shots before uploading them in Photoshop.
For example below there are 80 screenshots of Kara inside this folder and for a 1:1 (540 x 540 px) Tumblr gif, Photoshop can just work around with 42-50 max number of frames with color adjustments applied before it exceeds the 10 MB file size limit of Tumblr.

Sometimes I skip this step because it can be exhausting (haha) and include everything so I can decide visually which frames to keep later on. You'll understand what I mean later on. But it's important to keep the Tumblr 10 MB file size limit in mind. Fewer frames, or just the right amount of frames, is better.
So, with the screenshot organization out of the way, let's finally head over to Photoshop.
Giffing in Photoshop, yay!
Let’s begin by navigating to File > Scripts > Load Files into Stack…

The Load Layers window will appear. Click the Browse button next.
Find your chosen screenshots folder, press Command + A to select all files from that folder then click Open. Then click OK.
After importing and stacking your files, Photoshop should display the following view:

By the way, I'll be providing the clip I've used in this tutorial so if want to use them to follow along be my guest :)
If you haven't already opened your Timeline panel, navigate to Windows > Timeline.
Now, let's focus on the Timeline panel for the next couple of steps.
Click Create Video Timeline, then you’ll have this:

Now click the menu icon on the top right corner then go to Convert Frames > Make Frames from Clips

Still working on the Timeline panel, click the bottom left icon this time—the icon with the three tiny boxes—to Convert to Frame Animation
Select Make Frames From Layers from the top right corner menu button.
So now you have this:

Go and click the top right menu icon again to Select All Frames
Then click the small dropdown icon to set another value for Frame Delay. Select Other…

The best for me and for most is 0.05 but you can always play around and see what you think works for you.
Click the top right menu icon again to Reverse Frames.
I think Photoshop has long since fixed this issue but usually the first animation frame is empty so I just delete it but now going through all these steps there seems to be none of that but anyways, the delete icon is the last one among the line of feature buttons at the bottom part of the Timeline panel.
Yay, now we can have our first proper GIF preview of a thirsty Lena 😜

Press spacebar to watch your gif play for the very first time! After an hour and half of selecting and cutting off screenshots! 😛 Play it some more. No really, I’m serious. I do this so even as early (lol) as this part in the gif making process, I can see which frames I can/should delete to be within the 10 MB file size limit. You can also do it at the end of course 🙂
Now, let’s go to the next important steps of this tutorial post which I’ve numbered below.
Crop and resize to meet Tumblr's required dimensions. The width value should be either 540px, 268px, or 177px.
Convert the gif to a Smart Object for sharpening.
Apply lighting and basic color adjustments before the heavy coloring. I will be sharing the base adjustments layers I use for my gifs 😃.
1. Crop and Resize
Click on the Crop tool (shortcut: the C key)

I like my GIFs big so I always set this to 1:1 ratio if the scene allows it. Press the Enter key after selecting the area of the frame that you want to keep.
Side note: If you find that after cropping, you want to adjust the image to the left or another direction, simply unselect the Delete Cropped Pixels option. This way, you will still have the whole frame area available to crop again as needed and as you prefer.
Now we need to resize our gif and the shortcut for that is Command + Opt + I. Type in 540 as the width measurement, then the height will automatically change to follow the ratio you’ve set while cropping.
540 x 540 px for 1:1
540 x 405 px for 4:3
540 x 304 px for 16:9
For the Resample value I prefer Bilinear—but you can always select the other options to see what you like best.
Click OK. Then Command + 0 and Command + - to properly view the those 540 pixels.

Now we get to the exciting part :) the sharpen settings!
2. Sharpen
First we need to have all these layers “compressed” intro a single smart object from which we can apply filters to.
Select this little button on the the bottom left corner of the Timeline panel.


Select > All Layers
Then go to Filter > Convert for Smart Filters
Just click OK when a pop-up shows up.
Now you should have this view on the Layers panel:

Now I have 3 sharpen settings to share but I’ll have download links to the Action packs at the end of this long ass tutorial so if you want to skip ahead, feel free to do so.
Sharpen v1
Go to Filter > Sharpen > Smart Sharpen…
Below are my settings. I don’t adjust anything under Shadows/Highlights.
Amount: 500
Radius: 0.4
Click OK then do another Smart Sharpen but this time with the below adjustments.
Amount: 12
Radius: 10.0

As you can see Lena’s beautiful eyes are “popping out” now with these filters applied. Click OK.
Now we need to Convert to Frame Animation. Follow the steps below.
Click on the menu icon at the top right corner of the Timeline panel, then click Convert Frames > Flatten Frames into Clips
Then Convert Frames > Convert to Frame Animation
One more click to Make Frames From Layers
Delete the first frame then Select All then Set Frame Delay to 0.05

and there you have it! Play your GIF and make sure it’s just around 42-50 frames. This is the time to select and delete.
To preview and save your GIF go to File > Export > Save for Web (Legacy)…
Below are my Export settings. Make sure to have the file size around 9.2 MB to 9.4 MB max and not exactly 10 MB.

This time I got away with 55 frames but this is because I haven’t applied lighting and color adjustments yet and not to mention the smart sharpen settings aren't to heavy so let’s take that into consideration.
Sharpen v1 preview:

Sharpen v2
Go back to this part of the tutorial and apply the v2 settings.
Smart Sharpen 1:
Amount: 500
Radius: 0.3
Smart Sharpen 2:
Amount: 20
Radius: 0.5
We’re adding a new type of Filter which is Reduce Noise (Filter > Noise > Reduce Noise...) with the below settings.

Then one last Smart Sharpen:
Amount: 500
Radius: 0.3
Your Layers panel should look like this:

Then do the Convert to Frames Animation section again and see below preview.
Sharpen v2 preview:

Sharpen v3:
Smart Sharpen 1:
Amount: 500
Radius: 0.4
Smart Sharpen 2:
Amount: 12
Radius: 10.0
Reduce Noise:
Strength: 5
Preserve Details: 50%
Reduce Color Noise: 0%
Sharpen Details: 50%
Sharpen v3 preview:

And here they are next to each other with coloring applied:
v1

v2

v3

Congratulations, you've made it to the end of the post 😂
As promised, here is the download link to all the files I used in this tutorial which include:
supercorp 2.05 Crossfire clip
3 PSD files with sharpen settings and basic coloring PSD
Actions set
As always, if you're feeling generous here's my Ko-fi link :) Thank you guys and I hope this tutorial will help you and make you love gif making.
P.S. In the next post I'll be sharing more references I found helpful especially with coloring. I just have to search and gather them all.
-Jill
#tutorial#gif tutorial#photoshop tutorial#gif making#sharpening#sharpening tutorial#photoshop#photoshop resources#psd#psd coloring#gif coloring#supercorp#supercorpedit#lena luthor#supergirl#my tutorial#this has been a long time coming#guys. i'm BEGGING you. use the actions set - it was a pain doing all this manually again ngl LMAO#i've been so used to just playing the actions#so this has been a wild refresher course for me too 😆
771 notes
·
View notes
Text
How cutiesai made 14 Days With You
I've received quite a few requests in the past asking how I made 14DWY, what resources I used, how I organised my lore, etc. — so I figured I'd make one big post and share it with everyone else as well! It features a buuunch of helpful stuff I wish I'd known when I first made 14DWY, so hopefully this will help others too!
⚠ This is all copied & pasted from a Discord post I made back in early 2024! I'll also be adding to it over time, so feel free to check back every so often! ^^

What engine do I use?
14DWY uses the Ren'Py engine!
There are two preinstalled games (called "Tutorial" and "The Question") that give you a basic rundown on how to use the program!!
Zeil Learning's video called "Ren'py Tutorial For Beginners" is also a good place to start for those who have no idea where to begin with Ren'Py!
I also really recommend these Ren'Py resources:
Lemma Soft Forums
Ren'Py Discord server
Ren'Py subreddit
Zeil Learnings, ElaineDoesCoding, Visual Novel Design, and Ess Ren'Py Tutorials on YouTube
Searching through the "Ren'Py" tag on itch.io for community-made assets and resources (make sure to give credit if you use someone's asset(s))!
Feniks and Wattson offer some really helpful stuff!!
Not Ren'Py related, but helpful for creating a VN:
Obsidian and Notion for planning and worldbuilding
Visual Studio Code and Atom (comes preinstalled with Ren'Py iirc?) for scripting/coding
Pixabay and Pexels for royalty-free images and stock photos
DOVA-SYNDROME for music
Clip Studio Paint (paid) and Krita (free) for drawing
Toyhou.se to store your littol guys (If you need an invite code, I have over 300 to give away lmao ^^ Send in an ask to @cutiesigh if you'd like one!)
An itch.io account to upload your game for free and share it with others
General tips to keep in mind:
Make games for fun, not for fame. Too often, I see new developers create VNs with "trending tropes" because they see how successful it is and want the same level of popularity. As harsh as it sounds, this only makes your game feel hollow and superficial, and players will notice.
When using Ren'Py, it's better to have multiple .rpy files rather than putting everything into one large file!! It makes organising and finding things easier, and if something gets corrupted... at least you won't lose everything!
Plan everything beforehand, but give yourself room to expand and implement new ideas.
Start small and slowly expand over time. Don't start off with an overly ambitious project, as it can be disheartening when you put all this effort into something just for it not to gain any traction. Also, be grateful for your earliest supporters, as they're the ones who will lift your project off the ground!!
This is a personal preference, but I recommend starting off with itch.io as your main distribution platform. Most storefronts take a cut from your donations and revenue, and sites like Steam require a $100 fee just to publish your game on their platform. Itch is free, and you can even toggle off revenue sharing in your profile settings! (I like to keep it at 10% though, because I'm grateful for everything the site provides ♡)
If you ever need help with Ren'Py, you're always welcome to join the 14DWY Discord server and ping me in the help channel!
451 notes
·
View notes
Note
Whai kind of camboys would svt be? What content eo of them would offer?
seventeen as camboys

WARNINGS: smut, public sex, fingering/handjob, sub/dom, degradation, porn, tantric sex, porn asmr, dirty talk, edging, denial, sex toys, porn filters, amateur, sex partners, masturbation, forced orgasm, hand fetish...
seungcheol dom daddy af pov. full-on bdsm content. he’s got the handcuffs, the restraints.. he’s the type to sit back, shirtless, broad shoulders on full display, he’s telling the audience when they’re allowed to touch themselves, making them wait until he gives them the okay. sometimes he’ll tease by stroking himself, not showing his cock on camera. uses a mask too. and prize draw a fan for him to fuck on the channel's birthdays.
jeonghan edging and denial. always with someone new on cameras, he’ll start his stream fully clothed, just smiling that devilish grin, playing with his hair, “oh? you want me to take it off?” but he’ll drag it out for so long, giving lil’ peeks of skin here and there. sometimes he’ll straight up dip after a tease. he moans all breathy, making eye contact with the camera.
joshua hear me out.. asmr & dirty talk. joshua’s got a voice that’ll melt you, so ofc he’d be doing those long, drawn-out sessions where he’s whispering right into your ear, breathing heavy like he’s right next to you. audio experience—close your eyes, and it’s like he’s fuckin’ you with just his voice. “you want me louder? fuck, i’ll give you loud.”
junhui body worship. there for the visuals, his streams are all about him showing off—slow, oiled-up body shots, flexing, maybe even a lil’ self-praise thrown in. “yeah, you like what you see?” it’s basically softcore porn for your eyes, just… him flexing and jerking off like a fuckin’ greek god. “fuck, i make you so wet, don’t i?”
hoshi messy sex, rough sex & overstimulation. everything with hoshi is physical af, like he’s tryna fuck you through the screen. the type that even gets the camera dirty. absolute chaos. every stream is like a workout, sweat dripping down his body while he’s all breathless, flexing between rounds. “fuck, lemme catch my breath,” he’ll say, grinning at the camera, then he’s back at it, moaning loud enough to wake the neighbors.
wonwoo public sex. wonwoo’s always in public spaces, daring his partner to keep quiet while he fucks them somewhere they could get caught. or just masturbating in public. “don’t make a sound, or we’ll get in trouble.” dirty whispers, his hands everywhere while people walk by, totally unaware. pure adrenaline. all of that with him looking around, and them looking at the camera through his glasses.
woozi hands-only content = fingering&handjob masterclass/tutorial. man’s got skills, and he’s showing them off. finger-fucking a silicone cunt or fisting a dildo, or his cock, while he mutters filth under his breath. it’s like a fuckin’ anatomy lesson. he’s so damn precise with it, it almost feels unfair. you know he could make you cum in record time.
minghao tantric sex & roleplay. minghao’s streams are straight-up sensual. artful af. his streams are like some softcore art film, everything in slow motion, dim lights, silk sheets, slow burn. it’s less about the dirty talk and more about the vibe. but when he does speak, it’s smooth, deep, and straight to the point. “you’ve been waiting for this? let’s make it worth your time.” every moan perfectly timed, like he’s orchestrating the whole experience.
mingyu sub humiliation. big puppy turned sub, tied up, begging for more while he gets humiliated. he will moan pout, getting all flustered when called a good boy. the humiliation only turns him on more—loves begging. the bigger they are, the harder they fall.
seokmin sex toy review. mr. too sweet, all polite, “hi, how was your day?” then he gets into it and fuck, you’re blindsided. he’s got this wholesome look, but once he starts testing the toys, he’s so vocal too. moaning, breathless, almost embarrassed at how into it, because he needs to talk about the whole experience, he gets but also loving every second. the type that reads mostly of the streaming comments. “i hope you have a good night.” he’ll flash that sweet smile, by the end of the stream.
seungkwan mean dom, forced orgasm. this man is cruel in the best way. he’s tying someone to a chair, not letting them cum until they’re crying, pleading with him. “aww, baby, you’re all messed up, huh? too bad, i’m not done.” won’t stop until you’re a wreck. every tear is a turn-on for him.
vernon twitter-porn-style, faceless porn. faceless, purple bedroom lights, and it’s just his giant cock on display, no face, no extra fluff. the vids speak for themselves. slow strokes under fuzzy lighting, letting you focus on just the action. simple but devastating. maybe a low grunt or two if you’re lucky.
chan amateur couple content. chan’s a full boyfriend experience—enthusiastic af, experimenting, maybe even bringing in a partner sometimes. he’s loud, whimpering when he gets close, showing off how excited he is to try new things. you’re in it together, and his moans are infectious.
#seungcheol sorteia uma fã pra vc comer#seventeen reactions#seventeen imagines#seventeen headcanons#seventeen scenarios#seventeen#svt imagines#seventeen smut#seventeen x reader#svt smut#seungcheol smut#jeonghan smut#joshua smut#junhui smut#hoshi smut#wonwoo smut#woozi smut#minghao smut#mingyu smut#seokmin smut#seungkwan smut#vernon smut#chan smut#dino smut#soonyoung smut#jihoon smut#scoups smut#the8 smut#dokyeom smut
856 notes
·
View notes
Text
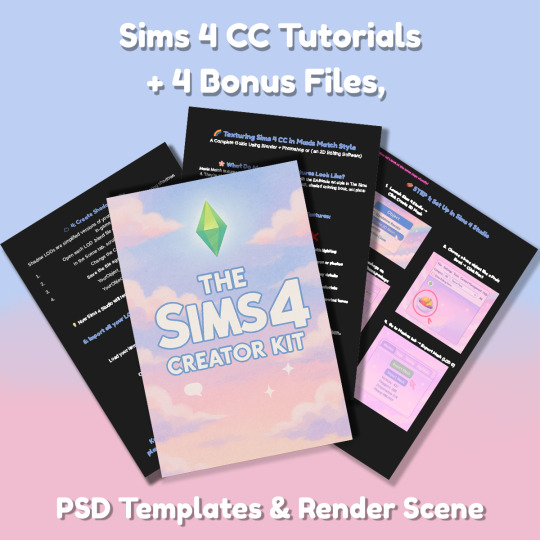
Sims 4 CC Kit — Make Your Own Lights, Decor, Clutter & Textures
Ever wanted to create Sims 4 clutter or decor CC but got stuck?
This kit is for you.
It’s a step-by-step guide that shows you how I make my own Sims 4 decor CC — lights, clutter, textures — in a way that I found works for me. You get guides, cheatsheets, templates, and my personal workflow that I’ve figured out through trial & error.
This probably isn’t the “proper” way of creating CC — but it’s how I learned, and it works and I use it every single time I create something new.
⚠️ Just to be clear:
This is a written tutorial kit, not a video or image course.
BUT — I’ve included some visuals, some screenshots & cheatsheets to help you follow along but its alot of written stuff. It would also be beneficial for you to have some basic knowledge of blender.
✅ What You Get:
Decor, clutter, lights CC Creation Guide
Shadow Mesh Tutorial
Mesh Cleanup Workflow
LOD Creation Steps
Maxis Match Texturing Cheat Sheet
Alpha Textures Basics
Vertex Paint for Lights Guide
Custom Thumbnail Tutorial
Normal & Specular Map Basics
Blender Basics Recap
Sims 4 Studio Quick Fix Cheatsheet
Blender Hotkeys Cheatsheet
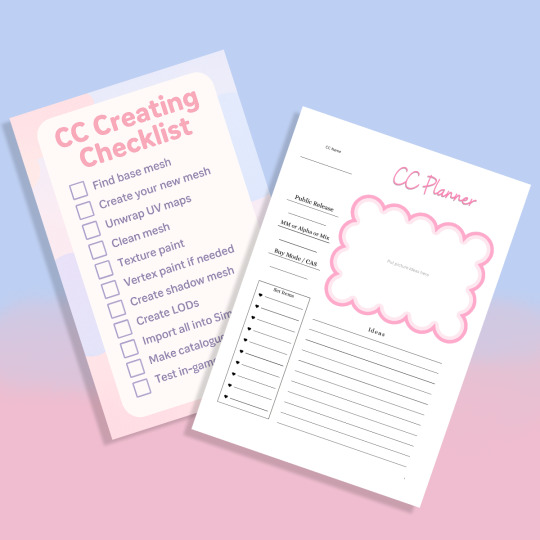
CC Planner to organize your ideas
CC Creating Checklist
PSD Thumbnail Templates (Decor)
Blank Normal & Specular Maps
Blender Render Setup File for Catalog Thumbnails
Texture Tips & Tricks
🎯 Why You’ll Love This:
No fluff — real steps, real help
Written for beginners who know basic Blender but need a hand
Includes a little bit of visual guides, printables & templates
Saves you HOURS of googling random problems
Helps you actually finish your CC & get it in-game
🖤 This is for you if:
You know basic Blender stuff (grab, rotate, edit mode) Got 3D Models you want to put into The Sims 4
You want to make clutter, decor CC and lights (not clothes or CAS yet)
You’re tired of tutorials that make you more confused
PS: Accessories & Clothing Creator Kits are coming soon.
If you get stuck, you can always join my Discord
(link’s on www.simmerkate.com).
Get Here (xx)
182 notes
·
View notes
Text
Understanding the Inverse Square Law
(Without Math)
When I was first getting deep into photography, I kept running into lessons about the inverse square law. They would always tell you the effects and the math but they never explained the cause. Why does the light do this?
It's like when the doctor gives you a pill to fix something. You swallow it, wait a bit, and eventually you feel better. But you rarely know what the pill is actually doing.
So when it comes to lighting, you have to decide if you want to be the doctor who understands the why or the patient who just swallows the pill and gets the desired effect.
Every tutorial will say if you double the distance of a light from a subject, the intensity will drop by 1/4. They will give you a formula so you can do exposure calculations.

Sometimes they will refer to somewhat helpful diagrams with clues on what is happening.

But most just teach the easy version.
If you move the light closer, you will get quicker falloff into shadow and the background will be darker.
If you move it farther back, everything will be more evenly lit, but the background will be lighter.
The teacher will shoot some examples and show you something like this.

By the end of this post, I want everyone who reads it to *truly* understand what is happening.
Because if you understand it on that level, it will change how you think about light and photography. It will have the added bonus of explaining magnets and WiFi and even the sound coming out of your speakers.
If I am an effective teacher, this is something you will think about in your everyday life, even if you don't care about photography.
In a previous post, I talked about how light was a bit like a shotgun blast. The closer you are, the more concentrated the pellets. If you are farther away, the shot disperses.

But this wasn't the analogy I wanted to use. It was just the easiest to find visual examples of.
My preferred analogy was spray paint. And I'm hoping with some janky home-made visuals, I can do a better job of explaining the concept.
Let's start by explaining the humble photon. It's the fundamental particle (or wave) of light. Think of them like individual tiny globs of paint in a spray can. A photon is emitted when something loses energy. And unmodified light sources typically shoot out photon globs in all directions.

A point light source is a theoretical concept where a single point in space shoots light evenly in every direction. For our purposes we're just going to imagine a basic light bulb as the point source.
But our eyes and cameras have a limited field of view, so from here on out we are going to think of the light emitting from the bulb as having a cone shape. We are just concerned with what a camera can actually see.

Well, well, well... what does that cone of light look like?

I'm sure we have all used spray paint before. So let's imagine we are spraying a white ball against a gray wall. We spray for 1 second and hold the can at different distances.

In each scenario we are spraying for the same length of time and the exact same number of photon paint globs are emitted from the nozzle.
Let's think about what each scenario would look like from the camera's point of view.
Here is our unpainted ball and wall.

Here is the spray can held at Distance 1.

Note how the red paint is very concentrated and appears bold and saturated.
Distance 2.

Now the same amount of paint is dispersed over a wider area. The bold red spot in the center is more muted. And some of the paint is spilling onto the background.
Distance 3.

Everything appears to have a light red tint. The background and the white ball appear to have similar intensities of red. The coverage is very even. The same number of photon paint globs are being asked to cover a larger area so they are spreading out and diluting the color.
Okay, now let's exchange tiny photon paint globs for real photons.
I'm bringing back my baseball and showing these same 3 distances.


The nice thing about eyeballs and cameras... they can compensate for different light intensities. Our eyes have night vision and cameras have long shutter speeds, large lens apertures, and ISO amplification.
And if we compensate for the dimming caused by the dispersed light...


Photography teachers will tell you that if you move the light farther away, the background will get brighter. In reality, everything is the same level of dim and the camera exposure is brightened.
What if we wanted to spray the same area from far away without losing as much of the red saturation? We could add a super nozzle to our spray can that emits a bunch more photon globs in the same span of time.

This would be like turning up the power of the light. You have to emit a bunch more photons in that same time scale to compensate. Then you don't have to adjust your camera settings when you move the light farther away.
Let's look at a practical example of when you might think about the inverse square law to help solve a problem.
You have two subjects in a scene, and you put the light just out of view of the camera. You might be thinking that a larger light source is softer, so you want it as close as possible.

Unfortunately only one person is lit in the scene. She is getting the concentrated photons before they can disperse.
So if we want both people to have similar lighting, we can move the light farther away. You will have to comprimise a little softness. And you will have to change your camera settings or increase the power of the light.

Note that the intensity of light in the area they are standing in is very similar now.
By using a large light modifier, the photographer was able to move the light back and keep its general softness, but also evenly light both subjects.
And now I need to talk about one aspect of my spray paint analogy that does not work with the inverse square law. And it has to do with the specular highlight on the baseball.
Spray paint does not reflect paint. It just sticks to things. And reflection throws a tiny wrench into my explanation. Because parallel light rays do not obey the inverse square law. When you light something, the most central photons from the subject's perspective are going to be traveling in parallel. They have a direct path from the light to the camera lens or your eyeball.

Now if the reflection material is perfectly matte, the light will disperse and act as the inverse square law suggests. But if the surface is even a little glossy, the most concentrated parallel rays are going to bounce directly into your eye as a bright white spot.

And if you study this diagram a little closer, you might figure out why specular highlights are usually white.
If you look at the specular highlight on the baseball, even though the rest of the image gets dimmer as the light gets farther away, that spot stays bright.


Though the spot seems to disappear at Distance 1. Curious, eh?
It's still there. It's still reflecting directly into your eyeball. But the light around it is so concentrated and bright, the specular highlight blends in.
Which means if you have some nasty highlights on your photo subject, moving your light closer might make them go away. If someone has a shiny forehead, this can equalize the overall exposure and hide the shiny.
This guy has a bright spot on his nose. It is there in both photos.

But his face is so much brighter in the left photo that the spot blends in. It's a bit of a mind bender because the camera exposure is adjusted so the finished photos appear the same amount of bright.
You have to remember if you only move the light farther away and don't increase its power or increase the camera's exposure level, the photos would look more like this.

So if you make the rest of the face as bright as the highlight, it blends in.
Neat!
So, was I successful?
Does the inverse square law make more sense?
This is why WiFi gets weaker at a distance. This is why magnets lose their attraction when you pull them apart. This is why speakers get quieter when you move away from them.
I can't tell you how much knowing the why has affected my thinking about lighting. I see so many video and photo people talking about lighting setups who are just following memorized placements.
"Put a light above the subject at a 45 degree angle to get Rembrandt lighting."
But the second they encounter light doing something unexpected, things fall apart. They resort to trial and error and brute force the solution.
Knowing how the pill works can prevent that frustrating process.
I no longer care about the math. I can just visualize the cone of influence and predict what will happen. Understanding the behavior of light and not just the end effects has made everything more intuitive. I just wish it hadn't taken me so long to understand this. But, hopefully, this post has shortened that journey for you.
198 notes
·
View notes
Text
How To Get Started Making Visual Novels
Wanna make a visual novel? Or maybe you've seen games like Our Life, Blooming Panic, Doki Doki Literature Club, etc. and wanna make something like that? Good news, here's a very basic beginners guide on how to get started in renpy and what you need to know going in! Before you start, I highly recommend looking at my last post about writing a script for renpy just to make it easier on you!
LONG POST AHEAD
Obviously, our first step is downloading it from their website

thankfully, its right on the home page of their site. Follow basica program installation steps and run the program. I highly recommend pinning it to your task bar to make it easier to access.
From there, you're met with the renpy app, it's a little daunting at first but let's talk about what all these buttons are for.

Projects
This part is simple, it just lists the current projects in the chosen directory. You probably won't have any in there of your own. You should still see Tutorial and The Question!
Both of those default projects are super helpful in their own ways, i highly recommend testing out the tutorial and playing around with it just to get comfortable with some of the basics.
Create New Project
The first step to actually making your game into a game!
You'll be met with a prompt letting you know that the project is being made in English and that you can change it. You can click Continue.
From here, you'll be asked to input a project name! Put in your games title, or even a placeholder title since this Information can be changed later! (this is also the title the folder will be in your file browser, be sure to name it something you won't overlook)

Now we get to choose our resolution!
If you have no idea what to choose, go for 1920x1080! This is the standard size for most computer monitors and laptops, but it will still display with moderately decent quality on 4k monitors too!
You can choose 3840x2160 as well. This is 2x the measurements of the default, with the same ration. These dimensions are considered 4k. Keep in mind, your image files will be bigger and can cause the game to have a larger size to download.

Now we get to choose our color scheme!
Renpy has some simple default options with the 'light mode' colors being the bottom two rows, and the 'dark mode' colors being the toop two rows.
You can pick anything here, but I like to choose something that matches my projects vibes/colors better. Mostly because depending on how in depth you go with the ui, it minimizes the amount of changes I need to make later.

Click continue and give it a minute. Note: If it says "not responding" wait a moment without clicking anything. It can sometimes freeze briefly during the process.
Now we should be back at our home screen, with our new project showing. Let's talk about allll that stuff on the right now.
Open Directory
This just opens that particular folder in your local file explorer!
game - is all the game files, so your folders for images, audio, saves, and your game files like your script, screens, and more.
base - this is the folder that the game folder is inside of. You can also find the errors and log txt files in here.
images - takes you to your main images folder. This is where you wanna put all of your NON gui images, like your sprites, backgrounds, and CGs. You can create folders inside of this and still call them in the script later. EX: a folder for backgrounds , a folder for sprites for character a, a seperate folder for spirtes for character b, etc.
audio - Takes you to the default audio folder. This is empty, but you can put all your music and sound effects here!
gui - brings up the folder containing all of the default renpy gui. It's a good place to start/ reference for sizes if you want to hand draw your UI pieces like your text box!
Edit File
Simple enough, this is just where you can open your code files in whatever text/code editor you have installed.
Script.rpy - where all of your story and characters live. This is the file you'll spend most of your time in at first
Options.rpy - Contains mostly simple information, like project name and version. There aren't a ton of things in here you need to look at. There is also some lines of code that help 'archive' certain files by file type so that they can't be seen by players digging in code however. Fun if you want to hide some images in there for later or if you just dont want someone seeing how messy your files are. We've all been there
Gui.rpy - where all of the easy customization happens. Here you can change font colors, hover colors, fonts, font sizes, and then the alignment and placement of all of your text! Like your dialogue and names, the height of text buttons, etc. It more or less sets the defaults for a lot of these unless you choose to change them later.
Screens.rpy - undeniably my favorite, this is where all of the UI is laid out for the different screens in your game, like the main menu, game menu, quick menu, choice menu, etc. You can add custom screens too if you want, but I always make my own seperate file for these.
Open Project - this just opens all of those files at once in the code editor. Super handy if you make extra files like I do for certain things.
Actions
last but not least, our actions.
Navigate Script - This feature is underrated in my honest opinion, it's super handy for help debugging! In renpy you can comment with # before a line. However, if you do #TODO and type something after it, it saves it as a note! You can view these TODO's here as well as easily navigate to when certain screens are called, where different labels are (super great if your game is long, and more. It saves some scrolling.
Check Script (Lint) - also super duper handy for debugging some basic things. It also tells you your word count! But its handy for letting you know about some errors that might throw up. I like using it to look for sprites I may or may not have mispelled, because they show up in there too.

Change/Update GUI - Nifty, though once you start customizing GUI on your own, it isn't as useful. You can reset the project at any point and regenerate the image files here. This updates all those defaults we talked about earlier.
Delete Persistent - this just helps you delete any persistent data between play throughs on your end. I like to use it when making a lot of changes while testing the game, so that I can reboot the game fresh.
Force Recompile - Full disclosure, as many games as I've made and as long as I've been using Renpy, i have never used this feature. I searched to see what it does and this is the general consesus: Normally renpy tries to be smart about compiling code (creating .rpyc files) and only compiles .rpy files with changes. This is to speed up the process since compiling takes time. Sometimes you can make changes that renpy don't pick up on and therefore won't recompile. In these cases you can run force recompile to force it. Another solution (if you know what file is affected) is to delete that specific. rpyc file.
The rest of your options on this right hand side are how you make executable builds for your game that people can download to extract and play later!

Sorry gang! that was a whole lot of text obviously the last button "Launch Project" launches an uncompiled version of the project for you to play and test as you go! Hang in tight because my next post is about how to utilize github for renpy, so you can collaborate easier!
611 notes
·
View notes
Text
puff, puff and pass | ot4 aespa


♫⋆。♪ ₊˚♬ ゚. high for this — the weeknd
synopsis : your dream blunt rotation, except you’re the blunt.
pairing : yoo jimin, ning yizhuo, aeri uchinaga, kim minjeong x fem!reader
genre : smut, porn without plot (sorry)
tags : high sex, aespa kind of gangbang reader to be quite honest—, objectification, reader is referred to as ‘it’ like once, oral sex, vaginal penetration, joint rolling tutorial included brought to you by jiminjeong xx, i’m joking, don’t do drugs yall
warnings : heavy use of drugs, like, they’re all high as hell help (more specifically marijuana) both fem!reader and aespa are intoxicated in this
word count : 1,4k(??)
a/n : the fact that i was basically finished with writing thisa while ago and the only thing stopping me from posting it was the fuckass moodboard.. AND EVEN THEN IT ISN’T EVEN ALL THAT I HATE ITTFJHHFJEJF anyways, here’s some food MWAHH love you sugarcubes<33

“come on, you’ve been at it for ages— pass it already.” complained ning, her voice all whiny.
from those words alone, a normal individual would think that the five girls in the room, including you, were doing a blunt rotation of some sort. or perhaps you all were just participating in a chill activity that consisted of passing around an object for entertainment, nothing harmless.. right?
well.. yes! you’d be right in assuming that it was, in fact, a blunt being passed around originally. that is, until the other girls (intoxication clearly having taken over the good parts of their brains) thought it would be a great idea to pass something else, another object, one that’d cure their boredom in the middle of fucking nowhere.
that said object turned out to be your very own body.
“ohh my god shut up—” was what aeri moaned, sharply inhaling air through her teeth as she fucked her cock deep into your mouth, the tip touching the back of your throat with every thrusting motion she made. you were on all fours in front of her, fitting all of her into your mouth, watching your head bob up and down her long shaft effortlessly as you took all of her rigid length like the good slut you are, it made her lose control of her senses. “fuck y/n i’m so fucking close—“
then, to both you and aeri’s surprise, right as she was about to finish all over your mouth, your hair was suddenly pulled on from behind. “ah-ah, too late, it’s my turn now.” was what you heard ning say from behind you in a singing tone, visualizing the kind of annoying smile she had on her face whilst saying that to aeri.
you winced at the sharp pain you felt on your scalp from such a tug, which was then immediately replaced by the overwhelming sensation by the feeling of ning’s dick sliding up and down your wet slit, teasing your entrance with her tip.
in response to having you pulled away from her at the moment of her sweet release, you saw as aeri’s face contorted from one of pleasure to one of frustration very quickly, despite her seemingly sleepy eyes due to the ridiculous amount of cannabis she ingested, and keeps ingesting. “i wasn’t done, asshole.” exclaimed the half-japanese girl, clearly upset that the chance to cum all over your pretty face got taken away from her and delayed for another short period of time.
ning simply laughed at her before swiftly sliding her cock into your wet, wet cunt. you moaned loudly, as being in a situation such as this one while simultaneously being high just made you feel everything way more than you usually would. it was like all five of your senses were invaded with different, filthy things, and all of those things contributed to making you feel so, so good. you felt mindless, only present to please those that were freely using your body.
you loved every single second, as dehumanizing as it was. perhaps that’s what made it so arousing.
“please— i’m doing her a favor. she knows this dick fucks her the best, right, doll?” you looked back at her with hooded eyes, unsure what to respond.
while yes, ning knows how to use her length, you were quite frankly blinded by the drugs at that moment.
all you really wanted was dick, regardless of how you got it.
so, you mindlessly nodded, “stick to jerking off and watching how it’s done, ‘kay?” is what added ning, earning another annoyed groan from the other girl in response, before the latter sat down on the couch before you. with that, each second that passed was an increase in speed for the girl on top of you, your back to her stomach.
“can you guys stop bickering already? it’s like, ruining the vibe.” said what sounded like jimin, her words were slow, clear and enunciated.
that’s when you caught a glance of her and minjeong, sitting on the other corner of the dark room. they, on their side of things, were rolling yet another blunt, minjeong was focused on intricately filling the folded paper with the marijuana whilst jimin held the filter for her, aligning its edges perfectly with the edges of the paper before rolling it, twisting the end of the joint and eventually lighting the latter.
“and can you roll that shit quicker? it’s getting boring having ning do everything.” snapped back aeri, a bit louder so that the two relevant girls could hear her above the music, clearly annoyed. obviously, ning heard and grinned at her mockingly, earning an eye roll from her.
“we’re working on it, be fucking patient, girl.” replied minjeong.
what differed her ways to handle you and ning’s was mostly the gentleness that was employed with you; aeri was rough, sure, but she also prioritized your comfort above everything else when you were sucking her cock. ning, on the other hand, was fucking you like she had a point to prove, she’d thrust into you in an almost animalistic way, also making sure that she could hear every single dirty noise that came out of your mouth.
not like that was hard to do anyways, with how loud and shamelessly lewd you were being for her.
with that being said, you weren’t exactly surprised when you felt her fingers lock your jaw into a tight grip, making you face the couch aeri was sitting on. the chinese girl dug into your skin with her long, pretty acrylic nails, leaving very visible red scratches on your stomach as she got closer and closer to her climax.
“you’re so tight, baby..” said ning with a groan, huffing and puffing into your ear with each pump of her dick into your walls, all of it causing you to moan out incoherent words. “oh fuck, i think i could do you for hours on end—”
when you actually concentrated on the girl in front of you, you noticed how no longer upset she seemed about being denied her orgasm, but more so impatient to have you all to herself again. she watched you attentively as she stroked her own dick, wishing she was the one to stretch your pussy out instead of it being done by the annoying and cocky girl that was behind you, ning.
those two are very close, so it’s very natural for them to take basically everything as a competition.
then, as if to prevent you from looking anywhere else other than her, aeri quickly stood up in front of you and grabbed ahold of your hair, rougher than usual, before impatiently teasing your already agape mouth with the head of her cock, slapping it against your desperate lips before bucking her hips into your mouth, inserting it effortlessly. ning was still behind you, pounding you just as mercilessly as she’s been doing this entire time.
you came, repeatedly, at that. what else could you have done when you were being fucked stupid by two different dicks at once, both at different speeds and intensities? obviously, it didn’t take long before they came inside of you, too. aeri’s warm juices filled the entirety of your throat, forcing you to swallow every drop of it as she pushed her cock down deeper, while the chinese girl's dick was buried deep into your wet, swollen cunt, the perfect view of your spread ass obviously playing a huge part in her orgasm.
teamwork at its finest! especially when the two other girls are finally walking their way towards you, stumbling in their steps, all giggly and jittery from the weed, clearly excited to make you take a puff out of their freshly rolled and lit-up joint. too fucked out to have at least one remotely coherent thought, you let them ruffle your hair and get a tight grip on it to make you face minjeong’s pale hand, holding the blunt in between her fingertips.
still recovering from aeri’s thick load in your throat, you didn’t even notice how jimin had her phone camera above you, filming you from practically every angle before locking your jaw in a tight grip, laughing and caressing your lips with her thumb.
“come on, pretty slut,” she said, her voice just above a whisper, “take a hit.”
and you did, you took multiple, even. you felt yourself lose every ounce of sobriety left in your body with every inhale you took of the joint, if you even had any. so much so that you weren’t even fazed by sometimes having it suddenly replaced by one of the girls’ dicks at times and even forgetting that all of that was getting recorded by jimin.
once that blunt was finished, they simply thought it’d be funny to have you crawl around on the floor like a desperate little whore that’s trying to get her throat used like it deserves to be, you took them, turn by turn, getting their mixed loads all over your mouth and throat, turn by turn.
unfortunately for you, you couldn’t remember what it was that happened afterwards, all you know now is that your head hurts like a bitch and that your legs feel like you went to the gym for a week straight with no breaks.
with that information, it was needless to say that you definitely got passed and used around by the other girls like you wanted for the rest of that long and hazy night.
#smut#kpop gg#kpop girl group smut#female reader#ningning aespa smut#winter aespa smut#karina aespa smut#giselle aespa smut#aespa smut#aespa minjeong smut#aespa jimin smut#yoo jimin#kim minjeong#aeri uchinaga#ning yizhuo#kim minjeong x female reader#yoo jimin x female reader#ning yizhuo x female reader#aeri uchinaga x female reader#aeri uchinaga smut#yoo jimin smut#kim minjeong smut#ning yizhuo smut
950 notes
·
View notes
Text
wips & misc. ✬

WORKS IN PROGRESS!

A HELPING HAND (feat. jj maybank)
| genre: smut | x: onlyfans!reader | synopsis: a young and inexperienced subscriber dm’s yours and jj’s twitter asking for tips on how to navigate a size difference, so of course you convince jj to go full out and make a personalised tutorial… | word count: 0.7k | progress: 12% |
-
HERE, KITTY, KITTY… (feat. jj maybank & john b routledge)
| genre: smut | x: leopard!reader | synopsis: you wake up groggy and disoriented after a kegger turned bad in the guest room of the chateau, with your bestfriend’s jj and john b attempting to let off a little steam unbeknownst to you… | word count: 0.2k | progress: basic ideas + dialogue outlined - 25% |
-
FRIGHT NIGHT OF HIS LIFE… (feat. jj maybank)
| genre: smut | x: bsf!reader | synopsis: you fall asleep in the chateau guest room after a kegger and unknowingly give jj the best view he’s ever seen, which leads to other things behind the thin walls, the other pogues just down the hall… | word count: 1k | progress: 40% |
-
CONSERVATIVE COWGIRL (feat. jj maybank & the pogues)
| genre: playful flirting one shot | x: [redacted]!reader | synopsis: [redacted]!reader is teased by jj once again… | word count: 0.3k | progress: | 85%
-
PRE-BONFIRE REVELATIONS (feat. platonic!kie)
| genre: girl talk | x: [redacted]!reader | synopsis: getting ready for the bonfire at your house with kiara.| word count: 0.6k | progress: 80% |
-
HANDS WILL NEVER BE FOR HITTING, EVER AGAIN (feat. husband!jj)
| genre: hurt/comfort | x: pregnant!reader| synopsis: jj confides in you about the pressure to break the cycle of abuse once and for all that luke had passed down onto him… | word count: 0 | progress: not started. |
-
A PEAK INTO PREGNANT!READER'S JOURNAL... (feat. husband!jj & baby maybank #1, aka quinnie-rae)
| genre: visuals | x: pregnant!reader | synopsis: a peak into pregnant!reader’s memory book/journal entries whilst pregnant with quinn & post-birth! | word count: ? | progress: 65% |
-
THE DIVINE FEMININE... A SERIES! (feat. all boys)
| genre: smut & angst | x: bsf!reader, leopard!reader, onlyfans!reader, pregnant!reader & [redacted]!reader | synopsis: a series based on one of my favourite albums of all time, each part a new song! | word count: 0 | progress: not started yet! |
EMOJI ANONS
✬ 🦢 anon
✬ 🕷️ anon
become an emoji anon in my ask box.

#꒰ up n’ coming ꒱ྀི#finally updated my wips!! 🥳🥳#jj maybank#jj maybank smut#jj maybank x reader#jj obx#jj maybank blurb#outer banks#jj x reader#jj maybank headcanon#jj maybank obx#obx#jj maybank outer banks#jj mayback imagine#jj maybank fluff#john b smut#john b x reader x jj#john b x reader#pope heyward smut#pope heyward obx#pope heyward x reader
138 notes
·
View notes
Note
Hi!! I absolutely love your colors and wanted to ask how you color skin tone :0!! I love how you shade it sm and would love to know how you do it!!! ❤️
HIII i thought i'd make this little tutorial to illustrate my thought process c:
we're starting off with grayscale because i place form sculpting and values above colors...
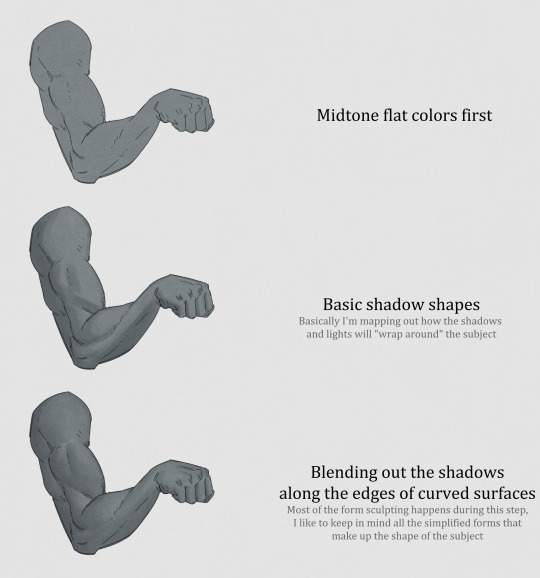
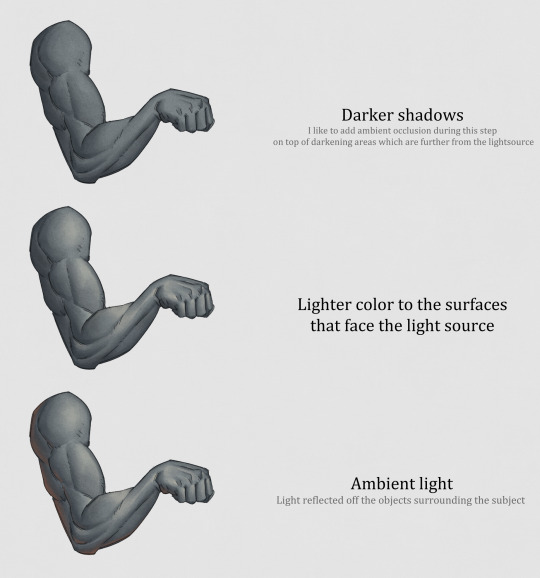
that's basically it! though, when dealing with different skin tones (both realistic and fantasy-based) i usually make the first layer of shadows a little more colourful to make the transition a bit more visually interesting/appealing
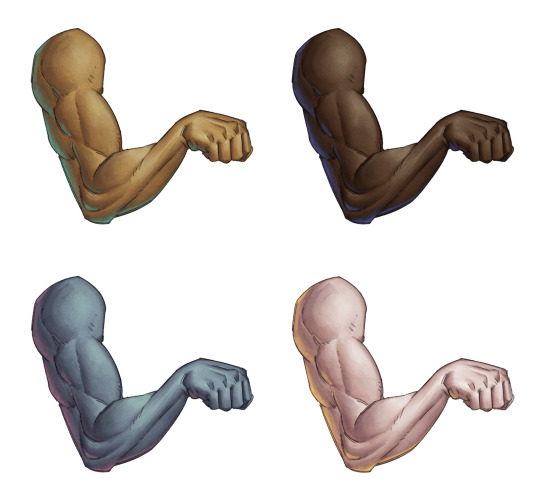
here's some more examples:
hope this was clear! i mentioned some tips in a post here too :]
241 notes
·
View notes
Text
CC Creation Tutorial: Smooth Seams in Blender

In this tutorial, I will show you how to make your mesh seams smooth inside Blender (no Milkshape required!) and walk you through the process step by step. We will make a perfectly smooth mesh and transfer the normal data from that mesh to our main mesh using the Data Transfer modifier.
I am using Blender 3.6 in this tutorial (though you should be able to follow along using other versions as well)
You do not need to have much previous knowledge to follow this tutorial, but I assume you know some basics in Blender like how to select, things, navigate around, etc, and know how to import the meshes and put them into Blender.
For this tutorial, I exported the Sims 3 afbodyEP4DressPromBigBow mesh with TSR Workshop. You can use any clothing mesh you like though, and works on any meshes, not just Sims 3 ones.

This is our mesh. You can already tell that it has the dreaded seams on the neck and the rest of the body.

First, we need to make a copy of the mesh (in Object mode, select the mesh and hit Ctrl+D Shift+D to duplicate it, then hit Esc to stop it from moving around).
Rename the mesh (I added Seamless to the mesh name).
Make sure the original mesh is hidden (click the eye symbol) and select the Seamless mesh.
Press the Tab key to go into Edit Mode.

Now we select the parts that we want to have smooth seams. Let's select everything that is skin (you can select a litte piece of the mesh and then press Ctrl+L to select the entire piece)!

Now, press M and in the menu, choose By Distance. (in older versions, this is called Remove Doubles).
This will remove all double vertices at the seams on the selection we made.

It will show you how many vertices it removed. The skin looks nice and smooth!
Let's switch back to our original mesh: Make sure you deactivate the eye on the Seamless mesh and activate the eye again on the main mesh. Then, select the main mesh.

Now, let's add a data modifier to our main mesh. Click the blue wrench icon in the vertical list of the properties panel and then onto Add Modifier, then choose Data Transfer from the list.

As the source, we choose our Seamless mesh.

Also toggle on Face Corner Data and click the Custom Normals button.
Hold on, there is a message saying that we should enable Auto Smooth in Object Data Properties. Let's do that next! (if the message does not appear for you, maybe Auto Smooth is already on).

Click the green inverted triangle button and in the Normals section, toggle on Auto Smooth.

Now we can switch back to the modifier tab by clicking the blue wrench icon again.
But hang on, what happened to our mesh? There are now black spots over the dress and shadows on the legs!

This is due to the Data transfer modifier's Mapping setting. If we change it to Topology, our mesh goes back to normal again. Phew!

Now that the normals look good, we can start the transfer of our new smooth normals from the seamless mesh to our main mesh. To do that, we hit the Generate Data Layers button. This button works destructively, so you cannot undo what it did, just FYI.

Note: On newer versions of Blender, Generate Data Layers may not be enough to transfer the normals and you may need to apply the modifier instead.
You can toggle the modifier's visuals on and off with the little screen icon to see the results after you click Generate Data Layers to see if it stuck. If it did not (and you see the seams of your base mesh when toggling it off), try to apply it instead.

I switched from textured to solid shading because the differences are just more noticeable in this mode. This is how our mesh looks now with the modifier turned off.
Because we clicked the transfer button, the normals have been permanently applied to our mesh. The skin is smooth now, and so is the dress (even though we did not smooth that one, hmm...)

If we toggle the modifier back on, suddenly the dress has seams again! What's going on there? I'm not exactly sure why, but Auto Smooth seems to be doing some smoothing on the dress mesh as well.
I am not sure if this is normal behavior or not, but let's pretend that this did not happen and the modifier in fact did not smooth the dress.
Maybe we just forgot to smooth some areas on the Seamless mesh that we noticed only later on. That's no problem. We simply modify our Seamless mesh again!

So let's swap back to the seamless mesh and select it (remember to click the eye icons so only the Seamless mesh is visible).

Let's select the main dress parts and press M -> merge by distance on them. We cannot smooth the whole dress all at once, because then that would remove some seams that we want (like those for the backfaces and the middle section of the dress where the bow is attached).
If we remove the wrong seams, we ruin our normals and will have black splotches.

Now, let's select the backfaces and areas we left out before and repeat this process: M -> merge by distance.

Look at how perfect our Seamless mesh is looking now! Now, let's transfer those beautiful normals to our main mesh.
Select the main mesh and toggle the eye icons again, to hide our Seamless mesh and reveal our main mesh.

Once again, we will use the Generate Data Layers button in our Data Transfer modifier. If you have previously applied the modifier, just add the modifier again to the main mesh and use the settings shown here.
And that's it, you are done! You have a perfectly smoothed mesh that you can export now.

Final Note: it is best to transfer the normals at the very end of your meshing process because any action that recalculates the normals can reset our custom-made smooth normals again.
Of course, you can simply use the Generate Data Layers button again to re-add them, but it saves you time to only do this step at the end.
I almost forgot to say: You still have to use Mesh Toolkit to fix the seams on the edges of your mesh and do the usual shenanigans.
188 notes
·
View notes
Text
Sissysims' sins against the scenegraph
This is a small follow-up to my initial post covering the code theft commited by @sissysims. In that post, I presented my proof in the form of a YT video. While that video started off private, I decided to make it public for various reasons, which I will not outline in this post.
I first want to express my gratitude to all those who left comments, reblogged and liked my post. Your support means the world to us. I'm so happy that you as a community are so supportive in this. Thank you, from the bottom of my heart. Thank you to all of you. ♥️
Now, this post is going to focus on just one thing: her incompetence at object creation, because honestly, it's bad. It's really bad. It would feel immoral not to discuss it.
This is just a glimpse and for all you object creators out there: I'm warning you, it's graphic.
How to create an object for dummies.
So, this is the simplest explanation I can give on making a new object. This is the basic process you follow for basically most things you will make: open up SimPE, open up the Object workshop and press open. Select your file and choose "clone". Leave the settings alone, defaults are fine. Give your new object a nice name and description. Be sure to give it a unique object name. Now do all your visual modifications by modifying the existing scenegraph resources (GMDC, TXTR, etc) and give your object a new GUID (making sure to update MMAT's). Now fix integrity, save your file and done. You can test and preferably you'd also compressorize.
So what did sissysims do wrong?
Simply said: everything. I have reasons to believe she has never followed a basic object creation tutorial. The mistakes she makes are mistakes that can be avoided by actually learning how to clone an object. Here is a small summary:
Not cloning anything, instead copying the file she wants to modify and opening that in SimPE
Not changing the object name. I have never seen her touch the fix integrity button
Using other people's meshes and textures. How? By way of opening up their files, noting down the 3D Object Name, extracting the scenegraph resources (GMDC, GMND, CRES, SHPE, TXTR, TXMT, MMAT) and putting them inside the package she's modifying (and modifying the 3D Object Name in the original package). I have not seen her open up a GMDC file or import or export a mesh or texture. She does not modify any of these scenegraph files afterwards.
Not updating the MMAT's with new GUID
Not cleaning out unused resources (see: the scenegraph fuckery above)
Never fixing integrity.
Sadly, this is not just the case with my vendor. It is all her projects. This is how she creates objects: she has never learned the proper way to create objects and thus she steals other people's hard work instead.
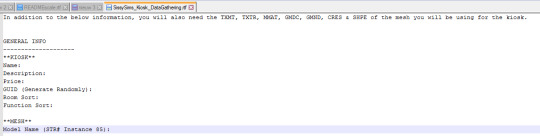
Pictured: the instructions provided for messing up my vendor. Note how she specifically instructs to extract resources from your mesh source. Not export. No: extract.
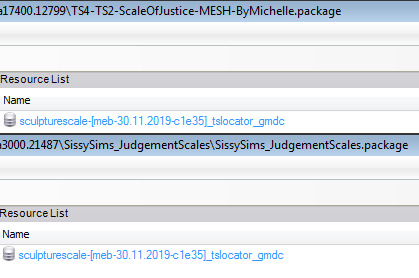
Pictured: the results of said messed up procedure on another creation of hers. Note how the gmdc of her object is literally identical to the gmcd of Michelle's original mesh (only credited in a readme, not in the post itself)
Why is this an issue?
This is not just an issue of someone being bad at creating objects. This is someone teaching others this messed up method that comes down to stealing other people's work. I believe that this is actively damaging to our community and newcomers' skill development. Her video teaches people bad modding habits. Her video ENCOURAGES people to use this method to make fundamentally flawed, fundamentally dysfunctional objects.
She claims to be wanting to make modding more accessible, but this video of hers is not helping with that in any shape or form. You need to know what you're doing in order to teach someone and her object creation skills are below the level of someone who followed a tutorial ONCE.
Ya know, I could make a video teaching people Serbian. I don't know anything about that language. It's Slavic I guess. I don't even know how it's pronounced, but I sure as hell could tell people that whatever sequence of sounds is coming out of my mouth is Serbian. And that using my tutorial you can have nice conversations with Serbians! Doesn't mean I should though. It would be misrepresentative, offensive and actually damaging to anyone who is serious about wanting to learn Serbian. The same principle applies to sissysims teaching modding.
I want to learn how to make objects and mods tho!
Good news, there are a lot of great tutorials out there by people who do know what they're doing (unlike sissysims). For basic object creation I would highly recommend this tutorial by Azaya/ @skulldilocks at Garden of Shadows. It's the tutorial that got me started with objects and it has plenty of pictures. If you follow this tutorial, you will be ten times better at object creation than sissysims is
For BHAV modding there is no better place to start than Echo's tutorial. I can also highly recommend @midgethetree's resources page as well as all the useful information @picknmixsims has on his site.
What now?
I will keep working on even better vendor code, which I hope to get to a testable state very soon. It's clear that there's interest in this sort of object, and the new vendor base will allow for a lot of flexibility in gameplay. Once I get it to a good working state, I will make a tutorial on how to make your own: a tutorial that'll actually tell you the why. If you can clone objects (the proper way), you will be able to make a vendor.
Also, please don't engage with sissysims in her youtube comments, not even to "defend our honour" or to say something about the theft. She knows what she did and has presumably received a tumblr notification that I mentioned her (again).
I am sissysims and I don't like this
Well, you have a lot of nerve "teaching" people to mod when you clearly don't know what you're doing. I encourage you to stop stealing other people's work and educate yourself (see resources above).
#sims 2 modding#fire flower speaks#sims 2#sims 2 kiosk#sissyims#this level of incompetence is almost impressive#I am normally not this salty. extreme incompetence just really ticks me off
104 notes
·
View notes
Text

Fully Underwater Lot Tutorial
@creida-sims @kitkat99
UPDATE January 2025
There is now a much, much easier way to do this. This version of SimPE now includes a tool to change terrain geometry. To edit the terrain in SimPE, go to Tools/Neighborhood/Neighborhood Browser and load your neighborhood. In the Resource Tree, select Neighborhood Terrain Geometry (NHTG) and select the only resource in the Resource List. In Plugin View, click Terrain Editor. It's very intuitive, but basically, you can edit the terrain under a lot to make it be underwater. You can also delete the road with the Road Editor.
I'll keep the old tutorial for archival purposes, but unless you can't or don't want to install this version of SimPE, it is pretty much obsolete.


Some warnings and disclaimers
1. This is not a beginner tutorial. I have tried to explain with as much detail as I can, but still, if you just started playing The Sims 2 I recommend trying out other building tutorials first.
2. I have tested it but there's always a possibility that some new problems will come up. Follow at your own risk. Backup your neighborhoods before trying this. Test it first in a new empty neighborhood.
3. These lots are roadless, so they require specific gameplay conditions to avoid breaking immersion (pun intended).
4. They will behave like normal lots in the sense that sims can walk around and do anything as if they were on land. There's one big problem to consider: when sims go fully underwater, their hair and some parts of their clothing might disappear visually.
So this is more useful for structures that sit above the water, shallow water that doesn't reach a sim's head or, with some modifications, small islands surrounded by water. So unless you want bald mermaids, I don't recommend this for sims that live underwater.
5. If you use Voeille's hood water mod, reflections will look glitchy in lot view, because this is technically not a beach lot. The only solution I found is enabling "Lot view ocean reflections" in RPC Launcher. Otherwise you'll have to deal with glitchy reflections.
6. Before following this tutorial, make sure you know the basics of creating, editing, importing and exporting SimCity 4 terrains. Written tutorial by SimEchoes here, video tutorial by loonaplum here.
Software and mods used
The Sims 2 FreeTime expansion pack (required for the modifyNeighborhoodTerrain cheat)
SimCity 4 (required) Hood Replace by Mootilda (required)
Lot Adjuster by Mootilda (required)
Portal revealer by Inge Jones (required)
Voeille's pond and sea water overhaul and RPC Launcher (optional, see disclaimers)
The Sims 2 Apartment Life and Bon Voyage expansion packs (optional, for "walk to lot/work/school" options)
Cheat codes used
moveObjects on/off
modifyNeighborhoodTerrain on/off
1. Creating/editing a terrain in SimCity 4
1.1. You can edit an already existing terrain or create your own from scratch. In both cases, you need to keep two things in mind: If you want the usable area of the lot to be underwater, such as making houses for mermaids or a coral reef, make sure the water is shallow. No more than a few short clicks with the terraforming tools in SimCity 4. This is because The Sims 2 live mode camera won't go underwater, so making the water too deep might make it uncomfortable to build or play the lot.
If you goal is to build a structure mostly above water, like a ship or an oil rig, you can get away with making the water a bit deeper, but not too much. I've noticed that sometimes the lot terrain tools stop working correctly if there a hill that's too steep.
1.2. Once you've created the terrain, you will need to add a small island on the area where your lot will be. I know it seems contradictory, but trust me, it will make sense. Create and name your city. Use the terraforming tools in city mode to make a tiny island of about 6x2 squares.

1.3. On the island, use the road tool to place a straight road that takes up 4 squares. Then, using the street tool (the last option), place two short streets at each end of the road.
Streets will disappear in TS2, only roads translate to roads in ts2, so why do we place them? Well, placing a street at the end of a road will get rid of the rounded end bit in TS2, which can't be used to place lots. This will be important for the placement of the lot and to make sure the edges of the lot are underwater. If this doesn't make sense yet, don't worry, it might make sense later.
1.4. Save the terrain. Don't exit SimCity 4. Copy your new/edited sc4 terrain from your SimCity 4 folder to your SC4Terrains folder in your Sims 2 documents directory. It is usually
"C:\Users\YOURUSERNAME\Documents\EA Games\The Sims 2 Ultimate Collection\SC4Terrains"

1.5. Back in SimCity 4, we're going to make a second version of this terrain. Remove the roads and streets you made before, with the bulldozer tool. With the level terrain tool in Mayor mode, carefully remove the island, so it's on the same level as the bottom of the ocean/lake. Don't change anything else. Save, exit and copy this second terrain to your Sims 2 SC4Terrains folder. Make sure you rename the file to something different from the first one, like adding "no roads" to the filename. You should have two terrains by the end of this step. One with the small island and one without it.
2. Editing the terrain in The Sims 2
2.1. Open The Sims 2 and create a new neighborhood using your new terrain. Something to keep in mind: if you want the terrain to be a subhood of another neighborhood, make it a subhood from the start. You will not be able to move the lot once it's finished, since it will be roadless. I don't recommend decorating the neighborhood for now. Leave it empty until the end of this tutorial.

2.2. Place the smallest empty lot (3x1) on the island.
2.3. In neighborhood view, open the cheat console by pressing Control + Shift + C, and type
modifyNeighborhoodTerrain on
To quote The Sims Wiki:
"This allows you to alter the neighborhood terrain by raising or lowering it. To use this cheat, be in the neighborhood view, then enter the cheat "modifyNeighborhoodTerrain on" (without the quotation marks), and click over the area you would like to change. To select a larger area, click and drag the cursor to highlight the desired area. Press [ or ] to raise or lower the terrain by one click, press \ to level the terrain, and press P to flatten terrain. When you're finished, type “modifyNeighborhoodTerrain off” in the cheat box (again, without the quotations)."
If you use an English keyboard, these instructions will probably be enough for you. If you don't, I recommend first testing the cheat, because the keys for using this cheat are different in other languages. For example, in my spanish keyboard, the question marks are used to raise and lower the terrain and the º/ª key flattens it.
Another aside: When you select an area using this cheat, a green overlay is supposed to show up. Some lighting mods make this green overlay invisible, like the one I use. If that's your case, you kind of have to eyeball it. Remember that one neighborhood grid square in TS2 is equivalent to 10 lot tiles, or the width of a road. I recommend getting a mod that allows you to tilt the neighborhood camera on the Y axis, which will allow you to have a bird eye's view of the terrain.

2.4. Flatten the terrain around the lot so it's at water level. This cheat won't allow you to edit the terrain inside the lot, so you have to edit the terrain around the lot. Make sure there is plenty of flat underwater space around the island. You should end up with something like the picture above. The water will have some holes, but don't worry, those get filled with water the next time you load the neighborhood.
2.5. Enter the lot and place any object on it. Save the lot and exit the game. This is so LotAdjuster recognizes the lot in the next step.
3. Expanding the lot with Lot Adjuster
3.1. Open Lot Adjuster and select your neighborhood and lot.

3.2. Click "Advanced…". Check "Over the road (only enlarge front yard)". Use the arrows to add 20 tiles to the front yard. Click "Finish" and "Restart".

3.3. Select the same lot again. This time, check "Add and remove roads". Uncheck the road checkbox for the front yard. Add 20 Tiles to the back yard, 20 tiles to the left side and 10 tiles to the right side. Check "Place portals manually". You should end up with a 60x60 lot, which is the biggest size. You might want a smaller lot, but unless you know what you are doing, I recommend starting with this size. You can shrink it later. The goal of making the lot this big is making sure the edges of the lot are underwater. Click "Finish" and exit.
4. Moving portals and flattening the lot

4.1. Make sure you have the portal revealer by Inge installed in your Downloads folder before the next step. Open your game and load your neighborhood. The lot should look something like the picture above.

4.2. Load the lot. Delete the object you placed before. Place the portal revealer on the lot near the mailbox/phone booth and trashcan. It looks like a yellow flamingo and you can find it in Build Mode/Doors and Windows/Multi-Story Windows catalogue. You will notice that when you select the object from the catalogue, some yellow cubes appear on the lot, and when you place the object, the cubes disappear. After placing the portal revealer, pick it up and place it again. This will make the yellow boxes visible again.
So what are those yellow boxes? They are portals. They determine where sims and cars arrive and leave the lot. The ones on both ends of the sidewalk are called pedestrian portals, and in the street, one lane has portals for service vehicles (maids, gardeners, etc.) and the opposite is for owned cars and carpools. You can see the portal's names if you pick them up. Make sure not to delete any of them.
Now, since this is going to be a roadless lot, ideally there won't be vehicles in it. This means that the lot would ideally be accessed through walking only. In community lots, this would not be an issue if you have the Bon Voyage expansion pack, which allows sims to walk to lots.
In residential lots, you might run into some problems. Service NPCs always arrive on vehicles, and unless your sim owns a vehicle, the carpool and school bus will always come to pick sims up for work/school. It might break your immersion to have a vehicle show up underwater or on a ship. There are many options to avoid this: having sims work on an owned business instead of a regular job, not having kids on the lot, making the kids homeschooled, avoiding calling service NPCs… it depends on how you want to play the lot. For example, my icebreaker is a residential lot, only adults live there, some sims live in it temporarily and none of them have a regular job.

All of this is relevant because we're going to move the portals. Where you move the portals depends on you. Think about how you're going to use the lot. In my icebreaker, I placed the car portals (which won't be used) underwater, on a corner of the lot. I placed the pedestrian portals on the ship, to pretend that the walkbys are part of the crew or passengers. But for now, just move the portals, mailbox/phone booth and trashcan to a corner of the lot. To be able to pick up the mailbox/phone booth and trashcan, use the cheat moveObjects on. Delete the street and sidewalk tiles using the floor tool (Control + click and hold left mouse button + drag).


4.3. Flatten the island with the level terrain tool. Save the lot. Almost done! Don't mind the hole in the water, this will be fixed. You will notice that in neighborhood view, the island is still there. This is because the neighborhood terrain under the lot hasn't updated. I don't know why this happens, but it does. Normally, moving the lot would fix it, but we can't move this lot using the game's tools. Instead, we are going to fix the terrain with Hood Replace. Don't exit the game yet.
5. Updating the terrain with Hood Replace
5.1. Create a new neighborhood using the new roadless terrain. Make sure it has the same type of terrain (lush, desert, etc.) as the first one. Again, name it "NO ROADS" or something similar. Exit the game.

5.2. Open HoodReplace. On the left column you will select your "NO ROADS" neighborhood. In the right column, select the neighborhood that has the underwater lot. Check these settings: Replace terrain, replace road, and versioned backups. Leave everything else unchecked. Click Copy.

5.3. Open The Sims 2 and load the neighborhood to check if the changes worked. That concludes the tutorial. At this point you can shrink the lot if you don't want it to be so big. Remember to move the portals to their final placement when you're done building the lot. Also keep in mind pedestrians (walkbys) always walk by the mailbox, so keep the mailbox accessible for sims.
If you're going to have multiple underwater lots, I recommend making them first, and decorating the neighborhood after. Doing this in an already existing neighborhood might be more difficult, mainly because, if you made any changes to the terrain using the modifyNeighborhoodTerrain cheat in the past, they might get reset when using Hood Replace.
155 notes
·
View notes